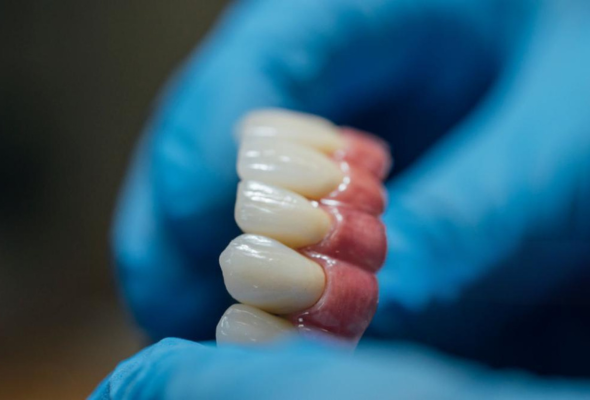
For dental clinics, lab work is both essential and margin-sensitive. Crown and bridge, implant, and removable prosthetics consume lab fees, chair time, remakes, and shipping. Outsourcing to China can reduce lab costs, but only if you treat it as a clinical workflow decision, not a purchasing shortcut. This guide is for dentists and clinic owners who want a structured way to evaluate, trial, and scale offshore lab production. We are a full-service dental laboratory based in Shenzhen, China — founded in 2012 and built around CAD/CAM digital dentistry — supporting clinics in 30+ countries. The principles below apply whether you send one case or build a recurring offshore workflow.
Step 1: Define What You Outsource — and What You Keep In-House
Not every case is suitable for offshore production. Start by mapping your case mix. Routine, digitally submitted restorations are often the best candidates: PFM crowns and bridges, full-contour and layered zirconia crowns, lithium-disilicate (Emax) crowns and veneers, ceramic and composite inlays and onlays, and retainers or night guards. Removable dentures—acrylic, flexible, metal framework, and titanium—can also be outsourced when records are complete. Implant restorations, including single crowns, bridges and full-arch cases, can be produced offshore when the clinic provides accurate implant system details, scan bodies, bite records, and design preferences.
Keep in-house the cases that depend on same-day delivery, highly collaborative esthetic try-ins, or unstable clinical conditions that may change during treatment. For example, a temporary or rush case may not fit an offshore turnaround. A complex full-arch case may be a strong candidate, but it requires more upfront records and a clear approval loop. Use a simple triage rule: offshore cases should be planned, non-emergency, and supported by complete digital or physical records. If a case is poorly scanned, has unclear margins, or lacks a reproducible bite, fix the records first. Sending a compromised case offshore usually creates a remake, not a saving.
Also define the scope of the lab relationship. Some clinics outsource only fixed prosthetics and keep removables local. Others outsource implant and full-arch work to access digital design and manufacturing capacity. The right mix depends on your clinical standards, patient schedule, and shipping tolerance. Write it down as a policy so your team knows which cases go offshore and which stay local.
Step 2: Vet the Lab Like a Clinical Partner
The lab you choose becomes part of your supply chain. Vet it with the same care you would use for a new associate or surgical supplier. Ask specific questions and request evidence.
Digital workflow credentials: The lab should work with Exocad or 3Shape design, CAD/CAM production, 5-axis milling, and 3D printing. Confirm the file formats it accepts, how it reviews scans, and how it handles design revisions. A digital-first lab can often spot scan issues before production and communicate changes quickly.
Quality control: Ask what happens from scan receipt to final shipment. A sound QC process includes case review, design approval, nesting and milling checks, sintering and finishing controls, occlusion verification, shade matching, and final inspection before dispatch. You do not need a factory tour to evaluate this; ask for a written workflow summary and how remakes are handled.
English communication: Your team should be able to send a prescription, ask a question, and receive a clear answer without translation delays. Test this during the vetting stage. A lab that responds precisely to a technical question is more likely to follow your prescription than one that only sends price lists.
Turnaround commitments: For regular cases, expect about 3 days of lab time. Implant and complex cases typically need 4+ days. Total turnaround including shipping is usually about 7 days. Ask the lab to confirm these timelines for your destination and shipping method. Get clarity on cut-off times, weekends, holidays, and customs delays.
Certificate transparency: Ask, "What certificates are available upon request?" A professional lab should be able to show you the actual documentation behind its material and process claims. Treat certificates as part of your due diligence, not as a substitute for case evaluation.
Also discuss shipping, packaging, payment terms, and remake policy before you send a case. A good lab will welcome these questions. Be cautious of any supplier that promises impossible timelines or relies on vague rankings and statistics instead of process details.
Step 3: Start With a Trial Case
Do not begin by sending your most complex full-arch case. Start with a controlled trial that lets you evaluate fit, occlusion, shade, communication, and turnaround. A straightforward fixed restoration, such as a PFM or zirconia crown, is a practical first case when the lab confirms it meets its current minimum. If you place implants frequently, a single implant crown can also be a good trial, provided you can supply the implant system and scan body details.
Prepare scans and impressions carefully. For digital cases, use a high-resolution intraoral scanner and capture the full arch, opposing arch, and bite registration. Ensure margins are visible and not obscured by blood, saliva, or scanner powder. If you use conventional impressions, select the right tray and material, pour or scan them accurately, and include a clear opposing cast and bite record. Poor records are a frequent cause of offshore remakes.
Write a detailed prescription. Include the tooth number, restoration type, material, shade, translucency, stump shade, occlusal scheme, contact tightness, cementation plan, and any special design requests. For implant cases, include the implant system, platform, scan body, and any angulation concerns. If the lab offers a prescription template, use it. If not, create your own checklist and attach it to every case.
Shade communication deserves extra attention. Use a shade tab, such as a classical or 3D shade guide, and photograph it next to the tooth with a neutral background. Include stump shade photos when relevant. Take retracted facial, lateral, and occlusal photos, plus a close-up of the prepared tooth and adjacent teeth. Natural light or a color-corrected light source is better than a flash that washes out detail. For layered zirconia or lithium-disilicate, explain whether you want higher translucency, more opacity, or a specific incisal effect. The lab can describe the material technology it uses, but you should not expect it to invent specifications beyond the material's intended use.
When the trial case returns, evaluate it clinically before cementation. Check marginal fit, proximal contacts, occlusion, shade, surface texture, and esthetics. If something is off, document it with photos and a clear description. Send the feedback to the lab. A well-run trial is not just about the first crown; it tests whether the lab can receive feedback and improve the next case.
Trial-Case Scorecard
Score each criterion 1 (unacceptable) to 5 (excellent) when the trial case returns. A total of 30+ out of 35 means the lab is ready for routine workflow; below 25, run a second trial before scaling.
- Marginal fit. No visible gap on explorer and radiograph; seats without rocking.
- Proximal contacts. Floss snaps through with light resistance; no open contact.
- Occlusion. Seats with shimstock holding on the restoration and light contact on neighbors; minimal adjustment needed.
- Shade and esthetics. Matches the shade tab and photos; natural translucency for anterior cases.
- Surface and polish. Smooth margins, no pits or rough spots; glaze even.
- Turnaround. Met the promised lab time and arrived on the scheduled date.
- Communication. The lab confirmed receipt, flagged any missing records, and responded to feedback with a concrete correction plan.
Step 4: Build the Workflow
Once the trial succeeds, turn it into a repeatable workflow. Standardize digital case submission. Use a secure portal, encrypted email, or the lab's preferred transfer method. Name files consistently: patient identifier or case number, tooth number, and date. Attach the prescription, STL files, photos, and any relevant radiographs. Confirm receipt and ask the lab to flag missing records before production.
Tracking is essential. Assign an internal case number and log the submission date, expected lab completion, shipping date, and delivery date. Ask the lab for status updates at key milestones: design approval, production, QC, and dispatch. If the lab provides tracking numbers, share them with your front office so appointments are not scheduled prematurely.
Create a feedback loop. After seating, record whether the restoration met your criteria. If there is a fit, occlusion, or shade issue, take photos and describe the problem precisely. Avoid vague feedback like "it didn't fit." Instead, state the tooth, the margin area, the contact, and the occlusal interference. This helps the lab correct the design or manufacturing issue and prevents repeat errors.
Clarify the remake policy before problems occur. Ask what documentation is required, what time limits apply, and who pays for shipping on remakes. A fair policy protects both sides. Keep records of every case, including prescriptions, photos, and correspondence. If you scale, this documentation becomes your quality control system.
Step 5: Scale and Manage Costs
Scaling offshore lab work is a logistics exercise as much as a clinical one. Batching can reduce shipping costs and simplify customs clearance. Group cases by material, shade, and turnaround priority. For example, send several zirconia crowns in one shipment and implant cases in another. But do not batch so aggressively that you delay urgent treatment. Balance cost efficiency with patient scheduling.
Plan turnaround realistically. Regular cases take about 3 days of lab time. Implant and complex cases need 4+ days. Total including shipping is usually about 7 days. Build this into your appointment book. If you promise a patient a crown in three days, an offshore workflow may not fit unless the lab offers an expedited option. For most clinics, a one-week total turnaround is predictable and manageable.
Understand shipping logistics. International courier services, customs duties, and import taxes vary by country. Ask the lab how it ships, what documentation it provides, and whether it can consolidate shipments. Track every package. Keep customs paperwork accurate and consistent. Delays often come from incomplete declarations or missing invoices rather than production.
Manage costs by looking at landed cost, not unit price. Include shipping, customs, remake risk, administrative time, and chair time. A lower unit price can become expensive if it causes multiple remakes or missed appointments. Track your internal metrics: remake rate, average turnaround, fit at seating, and shade acceptance. Use these numbers to negotiate volume terms or adjust your case mix. A hybrid model often works best: offshore for planned, digitally submitted cases and a local lab for urgent or highly complex situations.
Common Pitfalls and How to Avoid Them
Unclear prescriptions: The lab cannot infer your preferences. Use a standard prescription form with tooth number, material, shade, occlusion, contacts, and cementation. Attach photos and a bite record. If a case is unusual, write a short note or schedule a call.
Shade mismatches: Shade is affected by lighting, camera settings, stump shade, and material thickness. Use multiple reference photos, include a shade tab, and specify stump shade. For anterior cases, discuss layering and translucency expectations before production. If the first shade is off, send comparison photos in the same lighting conditions.
Poor communication: Slow or vague replies create delays. Set response expectations during vetting. Use one point of contact on your side and ask the lab to do the same. Confirm receipt of every case and ask questions before production, not after. If a lab cannot answer technical questions clearly, it may not be the right partner.
Underestimating shipping and customs: Build buffer time into your schedule. Confirm duties, taxes, and courier requirements. Keep commercial invoices accurate. Do not book a cementation appointment until the case has cleared customs and is in your hands.
Over-outsourcing too soon: Start with simple cases and scale gradually. Do not send full-arch implant cases until you have tested the lab's communication, design, and QC on smaller restorations. A staged approach protects your clinical reputation.
FAQ
What is the typical turnaround? Regular cases take about 3 days of lab time. Implant and complex cases typically need 4+ days. Total turnaround including shipping is usually about 7 days, depending on destination and customs.
What about certificates? Certificates are available upon request. Ask the lab for the specific documentation relevant to your market and case types.
Is there a minimum case size? Minimums vary by material, case type, and shipping destination. For a trial, choose a straightforward case agreed with the lab. For ongoing production, batching several units per shipment improves logistics. Confirm current minimums with the lab before submission.
Ready to Build a Predictable Offshore Workflow?
Outsourcing dental lab work to China can be a disciplined margin strategy when you define the right cases, vet the lab, run a trial, and build a tracked workflow. We are a full-service dental laboratory based in Shenzhen, founded in 2012 and focused on CAD/CAM digital dentistry — supporting crowns, bridges, veneers, dentures, implant restorations, retainers, and night guards for clinics in 30+ countries. If you are ready to test a case or discuss your workflow, contact us at [email protected] or WhatsApp +86 18925410015. Certificates are available upon request.